Help & Support
Everything you need to get started and master WeatherSmart Ads. We're here to help you save money and protect your ad spend.
Getting Started
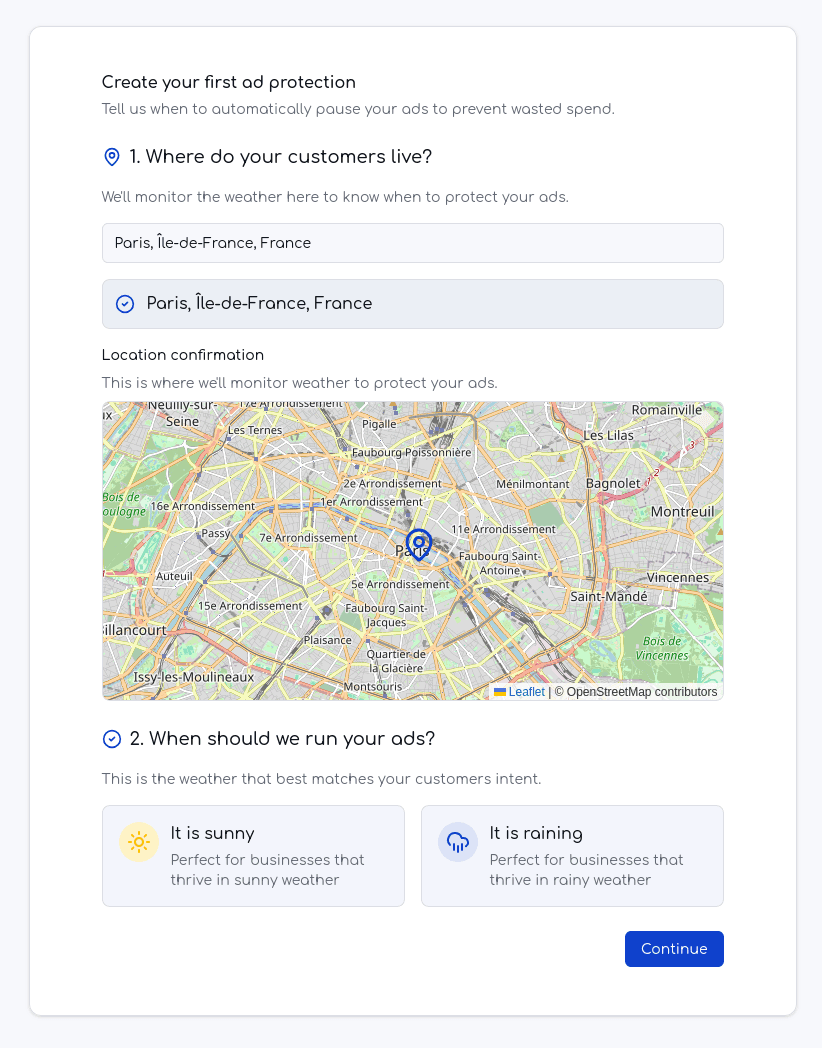
1. Create your first Ad Protection
The first step is to define your first 'Ad Protection'. You tell us the GOOD weather conditions when your ads SHOULD run. We'll ensure they run only when those conditions are met.
Remember: Remember the core rule: 'My ads should run WHEN [good condition] happens in [this place]'.
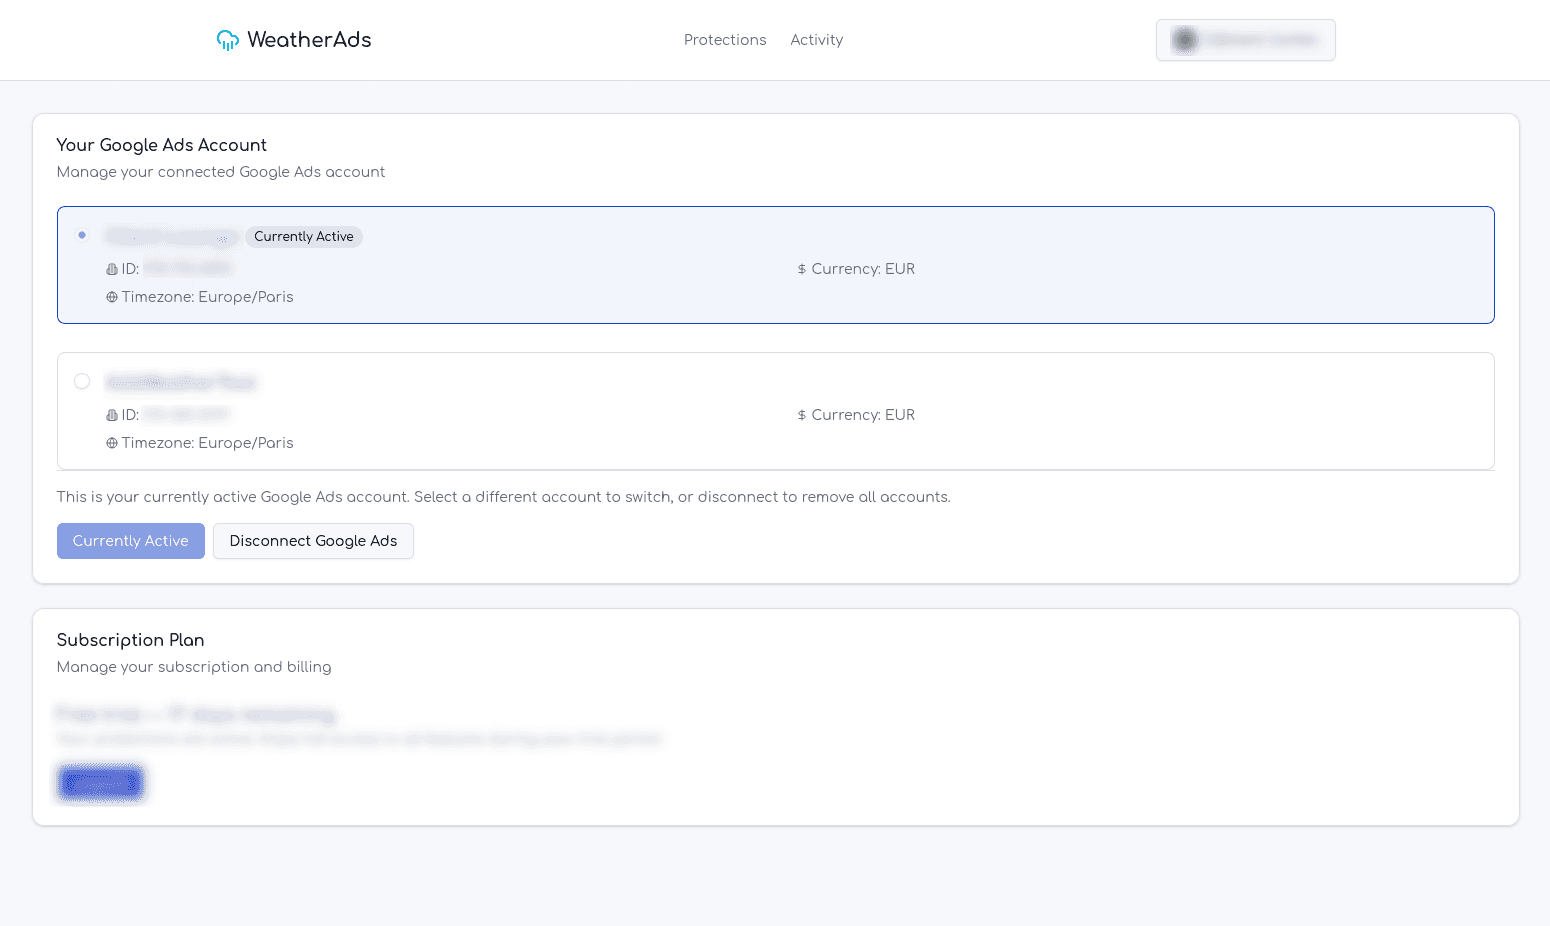
2. Connect your Google Ads Account
Once you have defined your weather protection, it is time to securely connect your Google Ads account. This allows WeatherSmart Ads to manage your campaigns based on weather conditions. We use official Google OAuth for a secure connection.
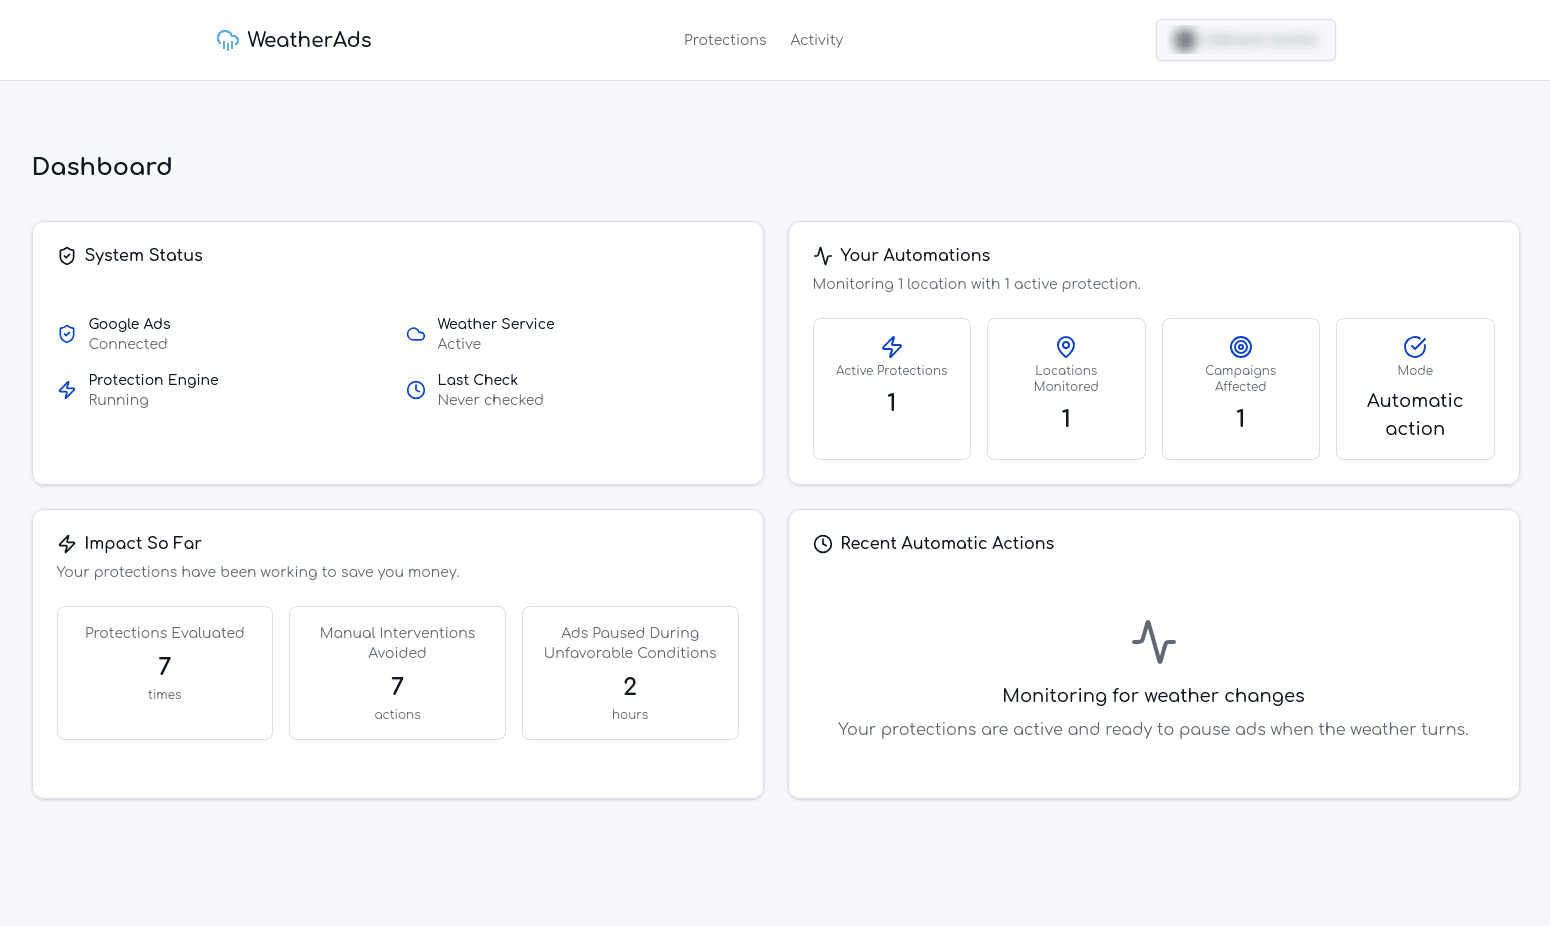
Understanding Your Dashboard
Monitor the health of your connections: Google Ads, Weather Service, and the Automation Engine. Ensure everything is running smoothly.
See an overview of your active protections, including the number of locations monitored and active rules.
Track the savings and value WeatherSmart Ads is providing. See how many times ads were paused and manual interventions avoided.
View a chronological log of all automatic actions taken on your campaigns, building trust and transparency.
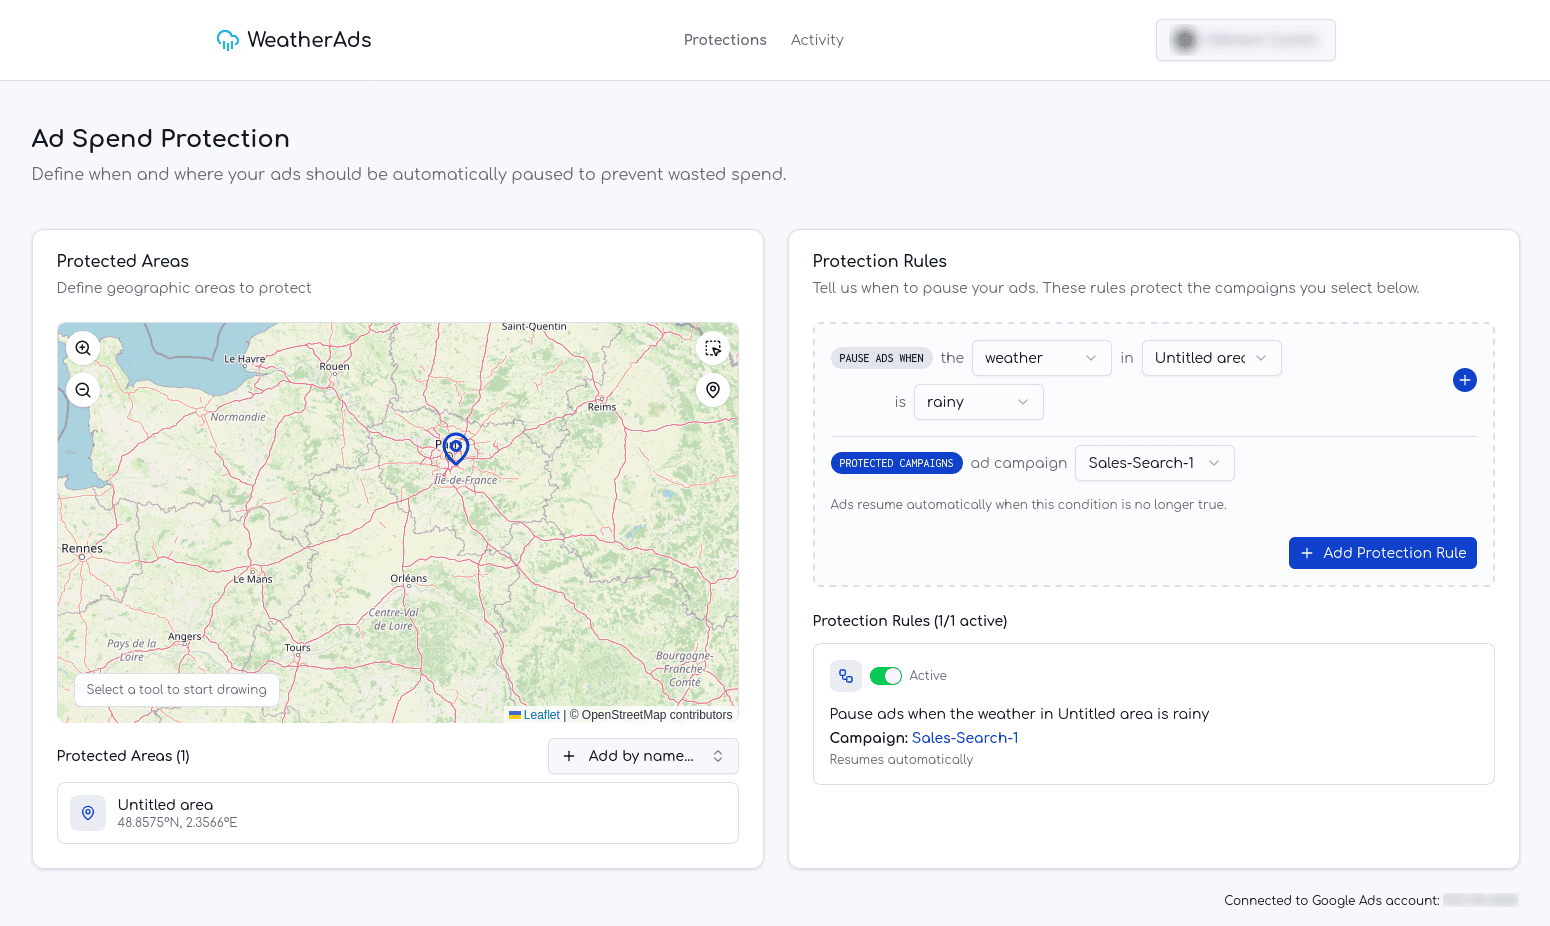
Managing Your Ad Protections
Easily view, edit, enable, or disable your Ad Protections. You have full control over when and where your ads are affected by weather.
Can't find an answer?
If you're stuck, contact our support via email: contact@weather-smart-ads.com.
We're here to help!